Delving into the world of “how to build your own mechanical keyboard” brings a unique satisfaction that comes from meticulously creating a device that’s an extension of your personal touch. It’s more than a hobby—it’s a craft, a form of self-expression cherished by typing aficionados and gaming enthusiasts alike. As you embark on this hands-on quest to assemble your custom mechanical keyboard, prepare to immerse yourself in an experience that’s as rewarding as it is challenging.
The Allure of Customization
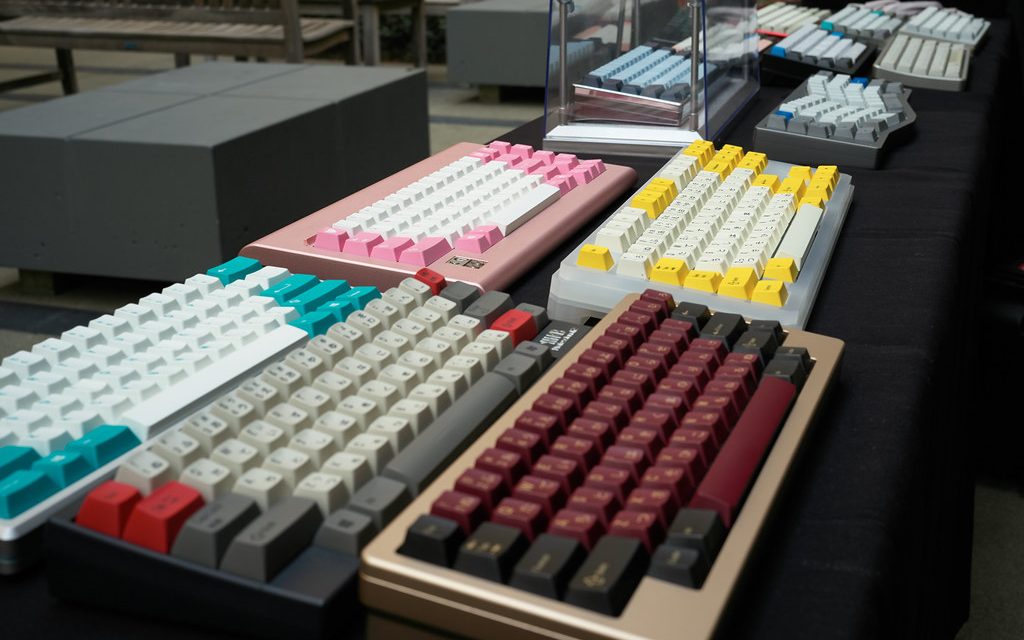
Custom mechanical keyboards stand out. They’re the loud, clicky cousins in the keyboard family, renowned for their durability and the satisfying tactile feedback they offer. But beyond that, building your own means a chance to create something that’s uniquely yours—from the click of the keys to the color of the backlight.
Understanding the Basics
Before we get our hands dirty, let’s run through the components of a mechanical keyboard:
- The PCB (Printed Circuit Board): The foundation of your keyboard, it’s what makes the magic happen when you press a key.
- Switches: They come in various feels—clicky, linear, tactile—and actuate your keystrokes.
- Keycaps: The part of the keyboard you see and touch, available in myriad colors and materials.
- Case: The housing that holds everything together. It can be simple or a piece of elaborate craftsmanship.
- Plate: This sits between the switches and the PCB, adding stability.
- Stabilizers: They prevent larger keys from wobbling.
- Cable: To connect your masterpiece to your PC.
- Extras: LEDs, dampening foams, or custom artwork to personalize your build.
Choosing Your Components
The first step is selecting your components. Each choice should be deliberate, each part a reflection of what you need and who you are.
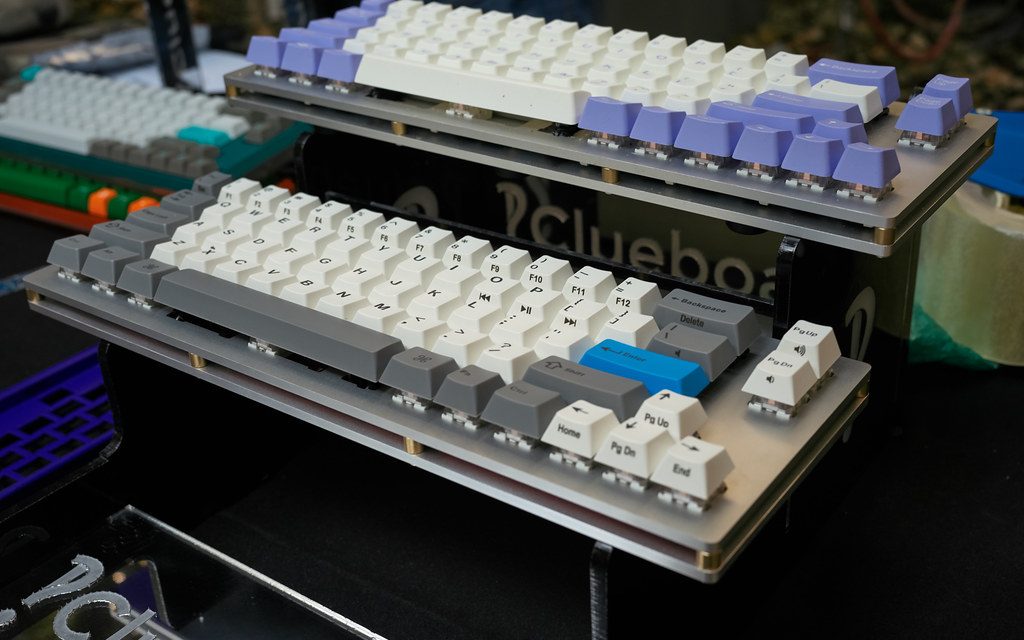
- PCBs and Switches: Do you want a full-size keyboard or something more compact? Do you prefer the loud clicky sound or a softer, quieter press?
- Keycaps: ABS or PBT? Blank or printed? The colors and materials of your keycaps will set the tone for your keyboard’s aesthetic.
- Case and Plate: Aluminum, plastic, wood? Each material has a different feel and sound profile.
When it comes to keyboard DIY components, think about your typing habits, aesthetic preferences, and ergonomics.
Assembling Your Toolkit
Now, gather your tools. You’ll need a soldering iron, solder, a screwdriver, and perhaps a small brush for lubricating your switches. Building a mechanical keyboard can be like model-building; it requires patience, precision, and the right tools.
The Build Process
Preparing the Workspace
Find a clean, well-lit space. Lay out your parts and tools. Ensure you have a good guide—whether a video or a written manual—especially if this is your first build.
Soldering the Switches
This is where the magic happens. You’ll place each switch into the PCB, secure them to the plate if you have one, and solder them into place. It’s meticulous work, but as each switch is soldered, you’ll feel your keyboard come to life.
Stabilizers and Keycaps
Stabilizers can be tricky. They need to be installed before the switches. Once in place, they ensure your space bar and other large keys move evenly and don’t tilt. After the switches, come the keycaps. This is the moment your keyboard truly becomes yours.
Programming and Testing
Many custom PCBs come with their firmware or support customizable firmware like QMK or VIA. This means you can program your keys exactly how you want them. Once you’ve flashed your firmware, it’s time for the best part: testing every key.
Customization: The Personal Touch
You’ve built your keyboard, but there’s more. Maybe you want custom keycaps with a specific font or image. Perhaps you’re eyeing artisanal caps for the Escape or Enter keys. LED lights? Go for it. Make your mechanical keyboard a statement piece that speaks volumes about your style and needs.
Troubleshooting Common Issues
It’s not uncommon to hit snags. A key might not work, or a stabilizer might be too tight. Don’t worry. Part of the DIY mechanical keyboard journey is troubleshooting. With a little patience and some research, you can solve most issues.
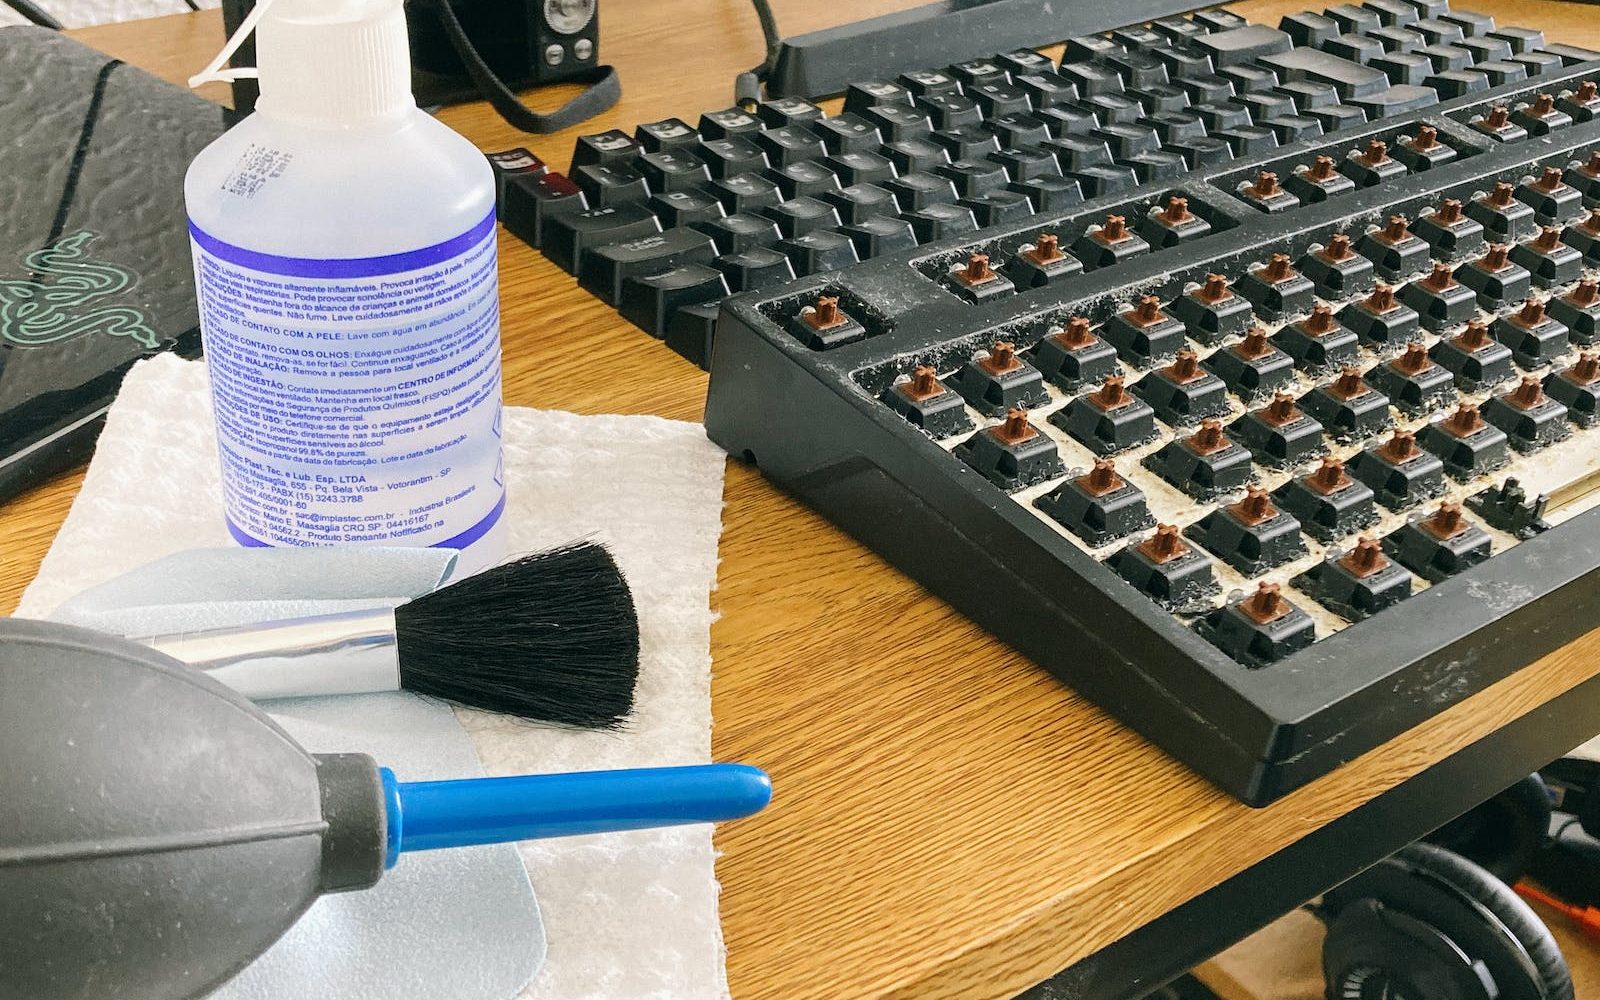
Maintenance and Care
A custom mechanical keyboard can last for years if maintained properly. Dust it regularly, clean the keycaps, and consider a switch lubricant to keep everything smooth. Your keyboard is both a tool and a piece of tech art; treat it as such.
Refinement and Community
After completing your first keyboard DIY project, you may find that the journey has just begun. Over time, you’ll learn what you truly want from your typing experience. Each key press might bring inspiration for improvement. Maybe the springs could be lighter, or perhaps a different switch type would better suit your gaming sessions or writing tasks.
Engage with the Keyboard Community
The mechanical keyboard community is vast and welcoming. Engage with forums, social media groups, and local meetups. Here, you can share your build, get advice, and find inspiration for your next project. The shared knowledge and passion in these communities are invaluable resources that can help you refine your craft.
Iteration: The Heart of DIY
Iteration is the heart of the DIY mechanical keyboard experience. Each build is a chance to iterate, to fine-tune, to perfect. Maybe you’ll want to experiment with a different layout, like ergonomic or ortho-linear. Perhaps you’ll venture into the world of custom cables or delve into the nuances of sound dampening.
Advanced Customization
Lubrication for Perfection
A subtle but significant aspect of keyboard customization is switch lubrication. This process, while time-consuming, can transform the feel and sound of your keyboard. It’s a meditative process, requiring attention to detail, resulting in a smoother, more consistent keystroke.
The Art of Keycap Crafting
For many, keycap crafting is a separate hobby in itself. Creating custom keycaps can be an artistic outlet, with various methods like resin casting, 3D printing, or hand-painting. The personalization options are endless, making your keyboard a canvas for your creativity.
Expanding Your Skills
Building your own mechanical keyboard is just the start. As you grow more confident, you might start designing your PCBs, creating layouts that cater to your specific needs, or even running group buys in the community for a custom design you’ve created.
The Market of Mechanical Keyboards
As you dive deeper, you’ll become acquainted with the market of custom keyboards. Limited edition runs, rare switches and exotic materials can become part of your builds. The market is rich with options, and while this can mean some investment, the result is a device that’s truly top-tier.
The Satisfaction of Sharing
Building a mechanical keyboard is a deeply personal journey, but the satisfaction doesn’t end at personal fulfillment. Sharing your creation, teaching others, and maybe even building a keyboard for a friend or family member can spread the joy of this craft.
Sustainability: A Conscious Craft
In a world where technology is often disposable, keyboard DIY stands apart. Not only does building your own device mean a personalized tool, it also promotes sustainability. Instead of discarding an entire keyboard due to a single faulty key, you can replace and repair individual components. This mindfulness towards consumption is a natural extension of the mechanical keyboard philosophy.
Conclusion:
In conclusion, crafting your own mechanical keyboard is a journey of personalization, from choosing components to final touches like custom keycaps and programming. It’s a meticulous labor of love, engaging you in a community of enthusiasts and a practice of sustainability. Your creation goes beyond functionality; it’s a unique expression of your individuality and a testament to your dedication.
Every key tells a story—a narrative of craftsmanship and a commitment to the quality of your digital interactions. Embrace the rhythmic dance of keystrokes on a device that’s not just built by you, but built for you.
Frequently Asked Questions (FAQs)
What do I need to build my own mechanical keyboard?
To build your own mechanical keyboard, you will need a PCB (Printed Circuit Board), switches, keycaps, a case, stabilizers, a plate (optional), and a cable. Tools like a soldering iron, solder, and a screwdriver may also be required, depending on the type of assembly.
Can I build a mechanical keyboard without soldering?
Yes, there are ‘hot-swappable’ PCBs available that allow you to build a mechanical keyboard without the need for soldering. This is a great option for beginners or those not comfortable with soldering.
How much does it cost to DIY a mechanical keyboard?
The cost of DIYing a mechanical keyboard can vary widely, from around $50 to $300 or more, depending on the choice of materials, components, and any custom designs or modifications.
Is it cheaper to build or buy a mechanical keyboard?
It can be cheaper to buy a pre-made mechanical keyboard, but building one allows for full customization. If cost is a factor, there are budget-friendly options available for DIY enthusiasts as well.
How do I choose the right switches for my custom keyboard?
Choose switches based on your typing preference: tactile, linear, or clicky. Consider the actuation force, the sound level you’re comfortable with, and whether you will be using the keyboard primarily for typing, gaming, or both.

Experience is what matters at the end!!
Hi! This is Jacob Jay – founder of Keyboardgear.com! From childhood to adulthood, I’ve always remained passionate about IT, and the revolution in this industry, especially gaming on the PC can’t go out of my way. Since I’m an enthusiastic gamer, and I love to experience various gaming accessories, particularly mechanical keyboards, that really boost my gaming adventure manifolds. So, my nerve cells hit me to transfer my experiences into word form and share with others to identify the ideal keyboards perfectly fit for their gaming modes.
I know very well how hard it is to find the high-quality items available on the internet that ought to be exactly the same as seen as on the screen. But the counterfeiters have ruined the user’s trust. As I have passed all such situations, I’m obliged to deliver the genuinity and express the same as what I am saying.
So, now, I’m working on the mission to provide very helpful and frankly but trustworthy reviews and guides about various mechanical keyboards, mouses, and other gaming accessories as per my personal experiences and sound knowledge.